Good Morning!
As you know I am participating in the One Room Challenge 6-week link party.
{Or if you are not sure what I’m rambling on about click here :)}
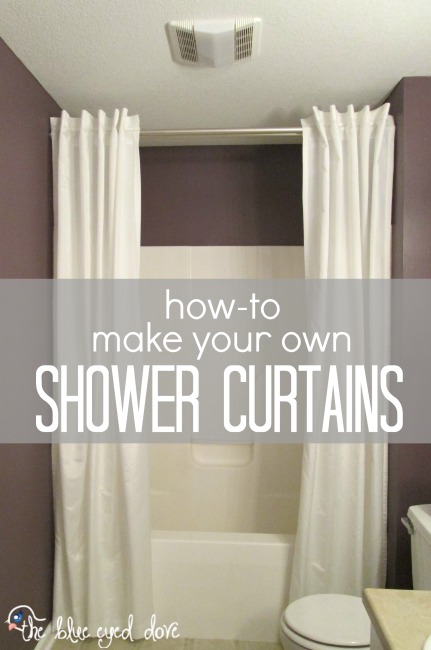
One of our tasks for this project was to make a shower curtain.
Now I know you are probably thinking “they sell lots of shower curtains in stores these days” and you are correct…
But for this remodel we decided to have an extra long shower curtain to create the ambiance of a spa, and make the bathroom appear larger.
So DIY shower curtain it is!
This project first started out with a little afternoon trip to an outlet fabric shop.
{aka Fabric Store Heaven}
Where they had 52,589 rolls of fabric to choose from.

And the prices averaged…wait for it…$1.50 per yard!
See what I’m talking about…Fabric Store Heaven 🙂
So the fabric for our shower curtain cost a whole $11.24.
Pure. Insanity.
Anyways…on to the tutorial.
You will need:
6 yards of fabric {mine was 60″ wide}
2 inch grosgrain ribbon
Scissors, Thread, Iron, Ironing Board and a Sewing Machine
Some assistance from a seasoned seamstress {aka Mom} if you are still somewhat of a novice sewer like me 🙂
Oh and a Real Housewives marathon playing in the background…because this will take a little time – but it’s completely worth it!
Directions:
1. Determine the length of the shower curtains {my curtains hang just about 7″ from the ceiling}.
2. Add about 6” in order to have enough to finish the top and bottom of the curtain {since my finished product is 90” I started with 96” length fabric}.
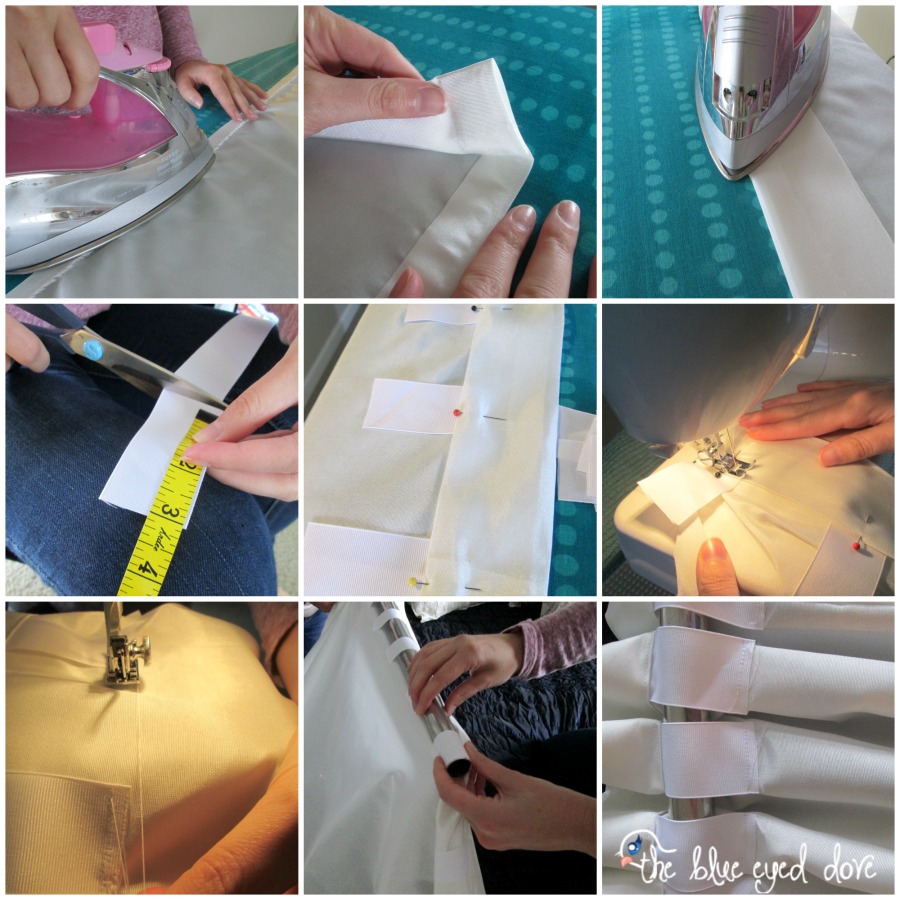
3. After cutting the fabric the length you want, start by folding the sides first. Fold about ¼” and press with iron. Then fold fabric again {about ½”} and press. Do this for both sides of the curtain.
4. Then pin the fabric in place and begin sewing each side close to where the inside fold is and press.
5. For the top of your curtain, start by folding the fabric ¼” and press down. Then fold again {about 2 ½”} and press that as well. Pin the fold in place.
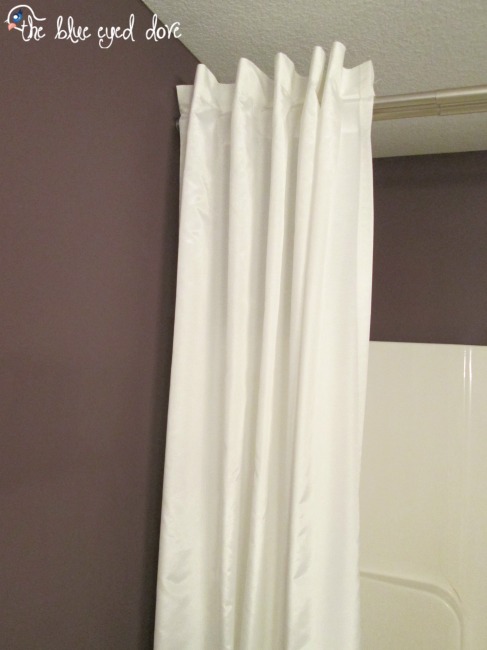
6. To make the tabs use the 2” grosgrain ribbon and cut into 3” long strips. {I used 6 ribbons tabs for the 2 side panels}. Lay the top of the curtain on the ironing board and start with the first 3” ribbon tab and place it at the end just under the fold {about ¼”} and pin it in place. Move along the top pinning ribbon about 7” apart {the width of my curtain is about 49” so this was how I got 6 tabs}.
7. Sew the top of the fold {where the ribbon is tucked under across the entire top of the curtain}. Note: The closer the ribbon tabs are to each other the smaller the pleat.
8. For the bottom half of the ribbon start by sewing at the first end of the ribbon. Back stitch each ribbon and continue sewing the bottom of all the ribbons.
9. Next, hem the bottom of the curtain {my shower curtain is 90” long so I measured accordingly}. The fabric we used is a light weight polyester blend, so we purchased weights to weigh down the curtain to help it lay nicer.
10. Lastly, place on shower curtain rod {we used a double curtain rod}. Repeat above directions for second panel.
Note: These shower curtains are not lined.
And you are finished!!!!
Time to admire your beautiful {and very cost effective} shower curtains!
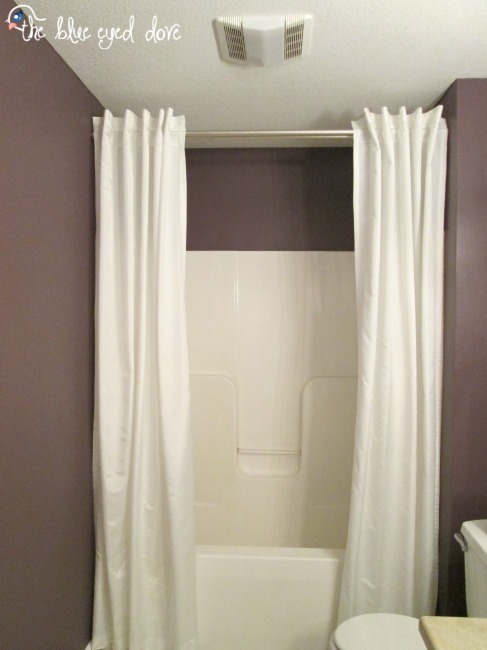
Now this may go without saying…but just in case – you will still need to purchase a shower liner to actually take a shower.
You don’t want to ruin your bathroom…or those new curtains!
I’ll admit this wasn’t as simple as making throw pillow covers…but it really isn’t as intimidating once you get going.
All you really need to know is how to fold, cut, pause to watch some major drama unfold on the Real Housewives, iron, sew and ask your Mom for assistance when you have no idea which direction to move in next 🙂
But…it’s so worth it!
Happy shower curtain making!




![Spring Break will be here before you know it! I have teamed up with some of my friends to offer you a fitness giveaway full of prizes to be shipped to you directly(in the continental US) or redeemed online! One Lucky Winner will receive these awesome prizes valued over $750 and includes: -One entry for yourself and One for a friend to The Refine YOU Program (beginning February 23). This will give you a customized nutrition and fitness plan to help you reach your goals! -One Fab Fit Fun Box full of self care goodies -$50 Fabletics Gift Card -One $50 [solidcore] gift card (may be used online for athletic wear) -One week of Dash Dinners (organic meal spice kits) TO ENTER 1. Like this photo 2. Tag one friend. Bonus entries for each tagged friend 3. Follow @refineyouindy and all the accounts they are following ***Winner will be announced on February 21st and posted on the @refineyouindy page and will be contacted directly. By entering, you agree to have your account posted to this page if you are selected the winner. This is not way sponsored, administered or endorsed by Instagram/Facebook. By entering entrants confirm that they are 18+ years of age, release Instagram/Facebook and all brands and participants of all responsibility, and agree to Instagram's terms of use. VOID where prohibited by law. No purchase necessary.](/wp-content/plugins/instagram-feed/img/placeholder.png)
 Pat says
October 20, 2014 at 8:42 amGood for Mom! They look great – love the hidden tab look!
 theblueeyeddove says
October 20, 2014 at 8:58 amThanks, Pat! It was nice to have help from someone with a little more sewing experience 🙂
 Ariean Schaefer Krieger says
October 20, 2014 at 11:08 pmLooks great…Very spa like! Love how the room is coming together!
 theblueeyeddove says
October 21, 2014 at 7:07 amThanks, Ariean! This room has been a lot of fun to redo 🙂
 Katie @ View From The Fridge says
October 20, 2014 at 11:17 pmWhat a great idea to make your bathroom spa-like! I would have never thought of extra long curtains! Great tutorial … now you have my mind spinning. Also … I have that same ironing board cover! 🙂
 theblueeyeddove says
October 21, 2014 at 7:08 amGreat minds think alike 🙂 Thanks, Katie! I’m excited to start accessorizing very soon! That’s the best part.
 Courtney @ Crafts by Courtney says
October 21, 2014 at 8:18 amI’ve haven’t seen a shower curtain open on both side before, how cool it that! I’m so excited to see everything.
 theblueeyeddove says
October 21, 2014 at 8:21 amThanks, Courtney! My sister saw a picture of it on Pinterest so we went with it. Seems very “spa-like”…so hopefully it turns out that way 🙂
 Ashley @ 3 Little Greenwoods says
November 4, 2014 at 9:18 pmI’m still scared of my sewing machine but love the look of your spa shower curtain! Such a great lush look!
I would love for you to share at my Show Me Saturday Party. We go live each Saturday morning at 7:00am EST.
~ Ashley
 Terri says
December 30, 2015 at 7:20 pmHi Erin! Just wondering where this amazing fabric store heaven is!?
 theblueeyeddove@gmail.com says
December 31, 2015 at 7:13 amHi Terri! The fabric store is called Zinck’s Fabric Outlet. Here is a link to there locations: http://www.zincksfabric.com/locations.html 🙂