
I used to love decorating real Easter Eggs as a little girl. We would dip eggs in dye, add stickers…you know, the whole nine yards. But, I think I’m past the age of dipping eggs in dye and adding stickers to them. Plus, you can’t let real Easter Eggs set out in a basket in your living room! Earlier this month I was in Hobby Lobby and saw some paper mache eggs and thought to myself, “We could use some shabby chic Easter Eggs in the Purple Palace!” This weekend I completed my Shabby Chic Easter Egg vision, while revisiting one of my favorite childhood Easter memories.
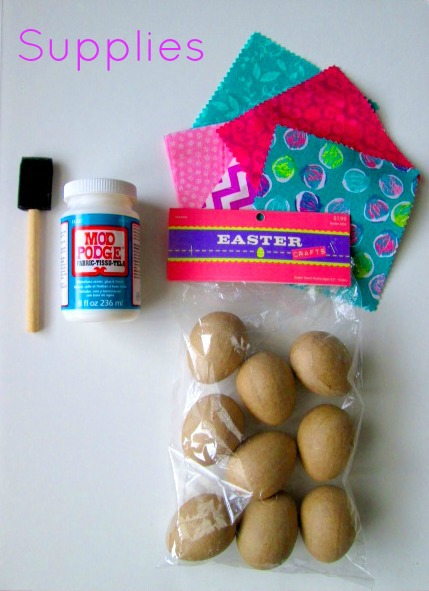
I bought the paper mache Easter Eggs at Hobby Lobby. I decided to use fabric on the eggs, but you could also use scrapbook paper. Luckily, I had some extra fabric scraps that I needed to use up anyways, so this project cost me about $7.

Directions:
1. Cut the fabric in six-inch squares. Note: If you are using a light-colored fabric you might want to paint the eggs white. That way they won’t look too dark under the fabric.
2. Place the egg on the center of the fabric at an angle. Then apply a thin coat of Mod Podge to the egg.
3. Attach the fabric to the egg in the middle. Smooth out any air bumps. Then attach the opposite angle.
4. Cut the fabric into strips. This way they lay easier on the top and bottom of the egg.
5. Pull each strip individually to cover the egg evenly. I didn’t need to use all the strips, so I trimmed down the ones I decided not use. I also trimmed some of the strips if they were longer than I needed them to be.
6. Press the fabric onto the egg and apply the Mod Podge where necessary. Make sure the fabric is smoothed out, and each edge is sticking to the egg.
7. Lastly, apply Mod Podge over the entire egg to seal. Allow to dry for about an hour.
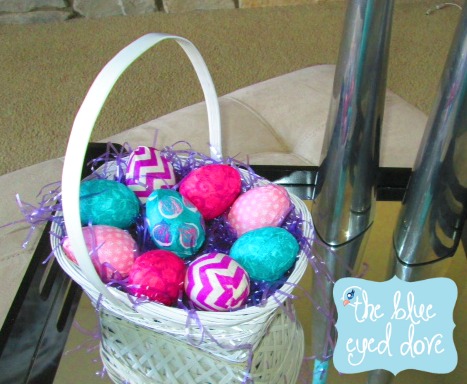
Then you have some beautiful Shabby Chic Easter Eggs!
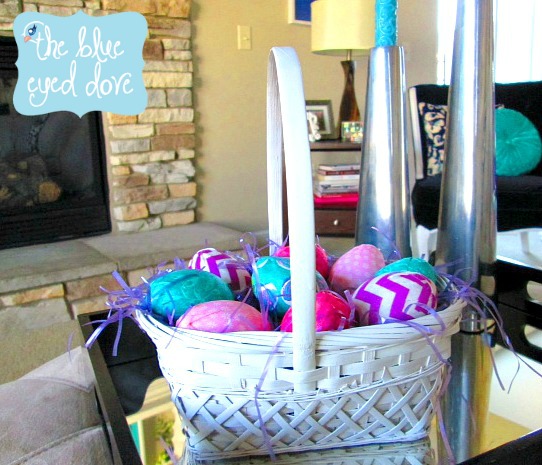

Don’t you think these Shabby Chic Easter Eggs are much more fun than the dyed, sticker-filled Easter Eggs? And they last so much longer too…bonus! :)
Have a great Monday!

I’ve linked up at:
Get Your DIY On, Craft Dictators, Tater Tots & Jello, French Country Cottage, Up to Date Interiors, The Happy Housie, Flamingo Toes, DIY Show Off, I Should be Mopping the Floors, Not Just a Housewife
Adorable, Erin! This would be a fun project with kids too! Pinning! :)
LikeLike this
Thanks, April! Yes, I bet kids would love making these too :)
LikeLike this
These are too cute!! Love the bright colors :) Thank you for linking up your Spring Project with us at Get Your DIY On. I hope you’ll join us May 4th with your flower projects! Hope you have a great Easter!
Mandy @ The Hankful House Blog
LikeLike this
Thanks, Mandy! Yes, I will be linking up again in May! Working on some projects now :) Have a Happy Easter too!
LikeLike this