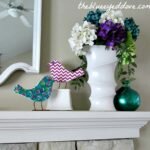
Here is my full DIY Shabby Chic Bird post (originally a guest-post over at House by Hoff).
I think it is safe to say that everyone is ready for spring this year. I personally love the sunny skies, warmer temperatures and pastel colors that the season brings. I also have started to become a fan of decorating with birds. They are so shabby and chic! And spring is all about the birds.
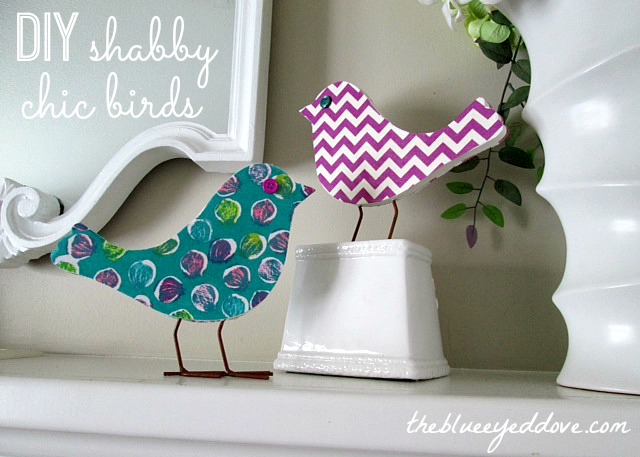
I found these wooden bird cut-outs at Michael’s, and immediately started to visualize the springy vibe they would bring to my home. I was sold! Then I found some fabric at Jo-Ann Fabrics that coordinated with my home decor, and felt like spring. Scrapbook paper would work just as well for the birds if you choose.
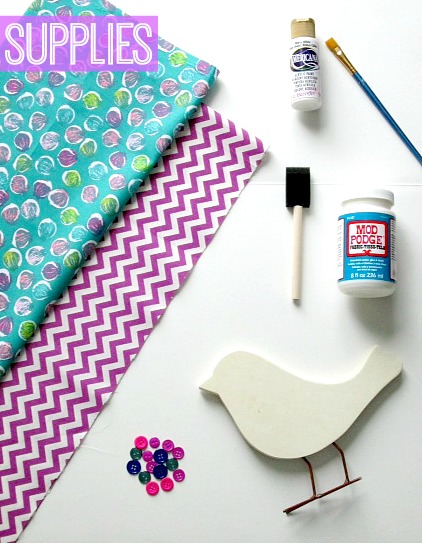
Directions:
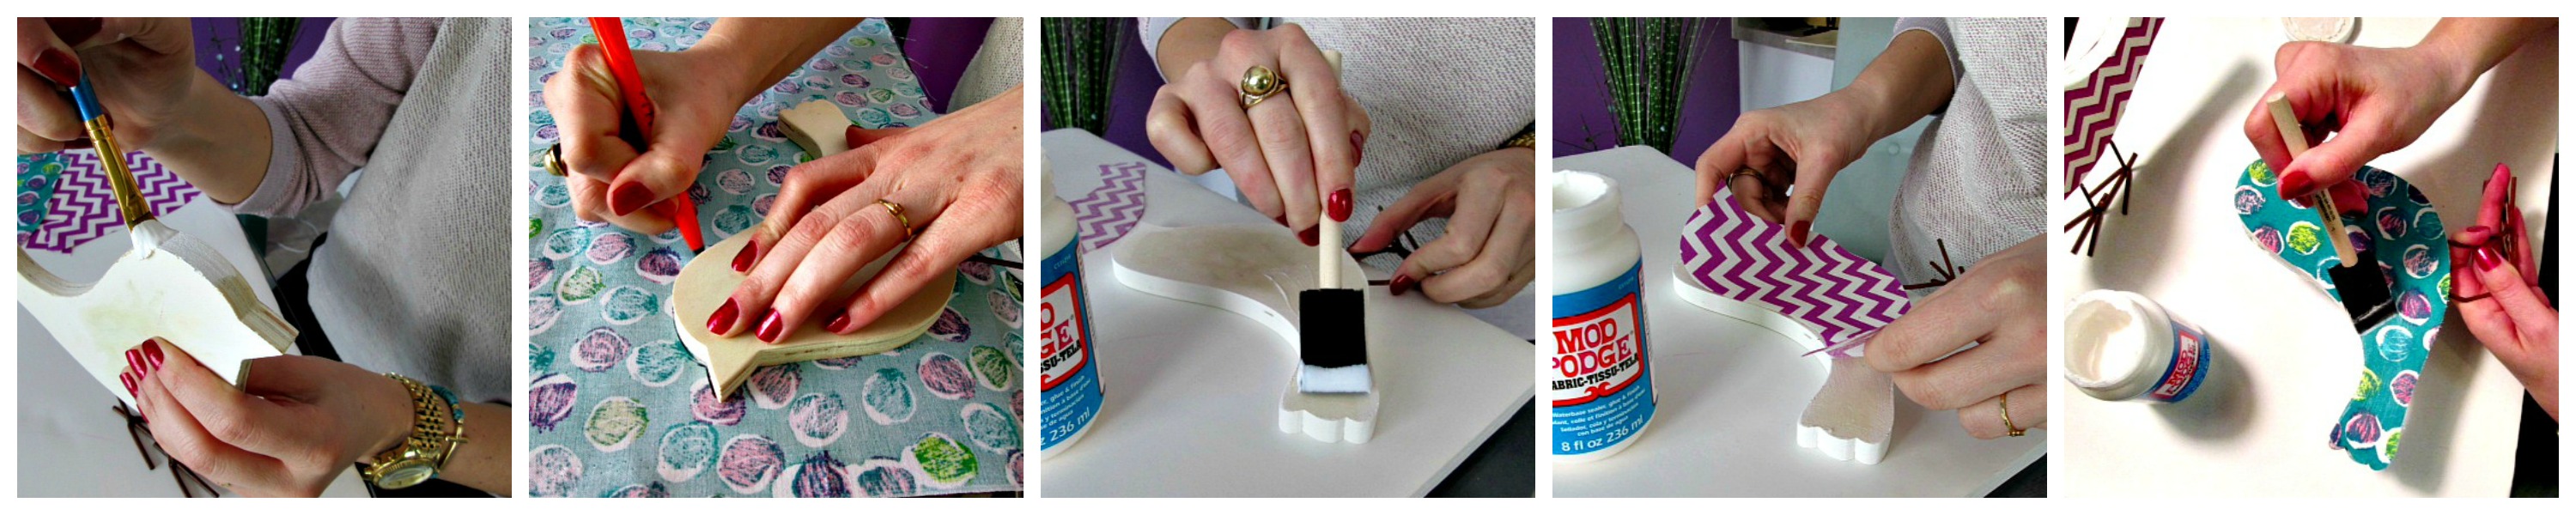
1. Paint the outside frame of the bird white, and let dry. I used two coats of paint.
2. Outline the bird cut-out on the inside of the fabric. Make sure you flip the bird over and outline the other side too. (Note: If you are using fabric make sure to iron it.)
3. Next, apply a thin layer of Mod Podge to the bird.
4. Add the fabric to the bird. Once the fabric is in place make sure to smooth it out evenly. Then add the fabric to the other side. Allow the Mod Podge to dry for an hour.
5. After the fabric has dried, apply a thin layer of Mod Podge to the top of the fabric on both sides. Let dry for at least an hour.
6. Lastly, the birds look cute with or without eyes. I decided to go with an eye, and hot glued a button on.
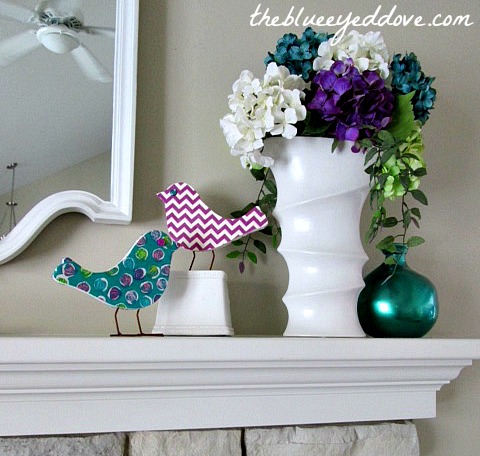
These birds were quick and easy to make, minus the drying time. Very shabby and chic, don’t you think!?
Have a great day!